 |
| Make your own free digital slideshow |
Friday, December 20, 2013
Saturday, December 14, 2013
What's next????
As this year starts closing in on me I start to get that itchy feeling about making changes! I can't help it, I am not one to sit still too long, in fact, my home at 440 has proven to be the longest address that I have stayed at since I lived with my parent's in high school! The itchy feeling is supplemented with the new found options that my husband Brent has brought to the table a Masters in Education Administration. With this certification comes more options, bigger doors, and an untouched world....
But tonight I stepped outside to the slicker than snot front porch that we have decorated with lights, there are two flags flying - one for our country and one for our community - each of these flags are radiating the beauty of the snow and ice that lay all around! This is where God put me, this is where I have support, this is where I am happy - why do the thoughts of the bigger world dance in my head?
I am not sure - this is who I am, this is how the Snyder's think - we are global, we are not boxed in, we dream! Once again - WE DREAM!!!!
Our dreams are fun, but our foundation is solid - God put us here for a reason!
This posting is on peace, trust, and faith.... very simple!
Sunday, August 18, 2013
I am still alive, but I feel like a Zombie Mommy!
.................breath..............ok breath again....................one more time............. ahhhh!
I did it - I made it through the 1st week of school! I am celebrating Skye being in 4th grade! I am celebrating Drake being in 3rd grade! I am celebrating ANY day I make it with sassy pants 3 year old Oliver! I am celebrating massive amounts of drool, eating baby food, and big SMILES for 5 month old Axel! I am celebrating Brent's 4th year of repeating 1st Grade! I am celebrating that it is 11PM and I am still sitting in an upright position! I am in such a celebrating mood, I might have that glass of wine I have been thinking about!
This is a new year (school year)and at our home our lives are just plain crazy and it is very hard for me to even think for a minute that I have time for ANYTHING at this moment, including sitting here and explaining to all of you what my heart is thinking! But I DO!!!!
I read a story the other day that reminded me of life, not the life I have, but the life that I am suppose to have. The one of love, differences, and the joys of the world that we seem to rush by and forget! I would encourage everyone to take a look, remember, and reflect on our attitudes and actions towards the young kiddos in our lives this year and how we can impact their future, their demeanor, and their person by our actions as adults!
The day I stopped saying Hurry Up!
We are the adults, they are the children... let them be just that...
(expect more from me, I am back on the blogging bandwagon!)
 |
| The Eccentric Snyder Family taking a moment to smell the fresh air at Garden of the God's |
Saturday, February 9, 2013
Repurposed Basement: Days 41-50
I'm starting to get giddy!
Here we are in the final stretch, but I can't wait any longer to give everyone the update and a final peak at what we have accomplished! I am so proud of Brent for all of his hard work and I am truly enjoying the excitement that the boys have to head down and play a little XBox and the new found peacefulness that has come to my main living area!
Here is what has happened lateley:
 This is the accent wall in the entertainment area.
Notice the awesome window trim that has been installed!
All made out of scrap lumber!
Extreme Craigslist Shopping Trip Included:


Here we are in the final stretch, but I can't wait any longer to give everyone the update and a final peak at what we have accomplished! I am so proud of Brent for all of his hard work and I am truly enjoying the excitement that the boys have to head down and play a little XBox and the new found peacefulness that has come to my main living area!
Here is what has happened lateley:
- Fireplace has been built in
- Accent Walls have been painted
- Floor has been painted
- Window Trim finished out
- Extreme Craigslist Shopping Trip
- Pink Floyd Mural from Sweden put up
- Moved In
- Floor trim needs to be painted and installed
- Doors need to be painted
- 2nd Beer Tap needs to be installed in the bar
- Rock n Roll Legends Posters need to be hung
- A SNYDER BASEMENT BAR GRAND OPENING PARTY
 |
| Fireplace framed in, brick panel installed behind it, painted yellow for punch of color |
 This is the accent wall in the entertainment area.
Notice the awesome window trim that has been installed!
All made out of scrap lumber!
 |
| High Gloss White Floor - AWESOME |
- Leather Contemeporary Sofa and Chair
- Pool/Ping Pong Table
- Fooseball Table
- 42" TV
- XBOX Rockband Set and 16 games
- Pink Floyd Mural
- Area Rugs
- Coffee Tables
- Curtains
- Legendary Rock n Roll Posters & Frames including: AC/DC, Led Zepplin, Johnny Cash, Elvis, Janis Joplin, Metallica, Beatles, Jim Morrison, Jimi Hendrex, and The Rolling Stones
- Beer Tap with an Electric Guitar Tap Handle
 |
| Pink Floyd Wall - Before |
 |
| Pink Floyd Wall Mural - AWESOME |
 |
| Love my NEW YORK Curtains! |

 |
| We have a basement that is finished and ready for Tornado Season!!!
The cost of Day 41-50=
Fireplace Brick Panel and left over paint= $28 + 1 hours
Accent Walls Painted = $28 for paint + 2 hour
Floor Paint = $60 + 4 hours
Window Trimmed Out = Free Scrap Wood + 2 hours
Extreme Craigslist Shopping Trip =
Sofa & Chair - $400
42" LCD Smart TV - $350
Pool Table - $150
Fooseball Table - $125
XBox Set-Up - $120
Bar Stools - $45
+ Full Weekend
Other Shopping Items =
Pink Floyd Mural - $250
Tables - $110
Area Rugs - $150
Curtains/Rods - $60
Bar Tap & Handle - $75
Rock & Roll Posters and Frames - $200
+ 1 hour to hang Pink Floyd + 4 hours to set up room
Still to come:
Floor Trim = $100 + 4 hours
Hang Posters = 1 hour
Paint doors = 2 hours
Install Beer Tap = 1 hour
Total Amount of time for Day 41-50 & predicted amount of time to finish = 70 hours
Amount of $ for Day 41-50= $2250
The running total of the project =
$3750/ 152hours
|
BEFORE & AFTER


Monday, January 28, 2013
Basement Repurposed: Day 31-40
What a difference a couple of days can make....
Well, here we are, stuck in the basement remodel time warp! First order of business is to give a shout out to my husband Brent... without his ability to listen to me he wouldn't have been able to create the additional relaxation station for our growing family! Way to "Rock It Out" Sweetheart! We all love your energy and devotion to making us happy!
Here is what has been done since my last post:
 This was where advise and everyone's personal experiences overwhelmed us, so we finally just broke down and did our own thing... something we didn't see anywhere else on the internet and haven't seen it suggested anywhere either... who knows, we might regret it later, we might not, we might be on to something, and we are sure someone will have something to say about what we decided... but if you know us, it is just the way we roll!


 To minimize the drilling and screws/nails in the concrete foundation Brent made sure that the tin was not mounted directly to the concrete walls. He decided that he would use 2x2 strips along the top and the bottom of the wall, secured with 3 screws each to the concrete. By doing this, Brent would be able to secure the tin at the top and the bottom 2" off the wall. This would allow the walls to breath and for us to be able to detect any potential water leaks on down the road.


Well, here we are, stuck in the basement remodel time warp! First order of business is to give a shout out to my husband Brent... without his ability to listen to me he wouldn't have been able to create the additional relaxation station for our growing family! Way to "Rock It Out" Sweetheart! We all love your energy and devotion to making us happy!
Here is what has been done since my last post:
- Bar area floor painted
- Bar moved in
- Drywall up, taped, mudded, and painted
- Fireplace Repurposed
- Barn Tin mounted on walls
- Barn Tin painted
- Lights hung over pool table area
If I had to tell you the most difficult part of this remodel, it would be filtering all of the "advise" that is found on the internet... It is very overwhelming! The first thing for anyone reading this blog and anyone that has Googled it and come up with what they think might be the "right" way to do something, please understand.... WE ARE NOT PROFESSIONALS! We made a very conscious decision when we started this project that it wouldn't be the Full Monty basement remodel, but an upscale face-lift. We want to make sure that we have a safe, warm, and fun area for the boys (including Brent) and to make sure that we do not have any long term moisture problems that need to be addressed before we invest $1000's of dollars in something that isn't correct. With all of that said, let's take a look at what we have come up with!
FLOOR PAINT::::::::::::::::::::::::::::::::::::::::::::: UGGGGGGGGG!
 This was where advise and everyone's personal experiences overwhelmed us, so we finally just broke down and did our own thing... something we didn't see anywhere else on the internet and haven't seen it suggested anywhere either... who knows, we might regret it later, we might not, we might be on to something, and we are sure someone will have something to say about what we decided... but if you know us, it is just the way we roll!
We decided to use Rust-Oleum Oil Based High Performance Enamel Paint in Gloss Black for the bar area floor
 |
| Bar Floor Painted Glossy Black (picture was taken with drywall dust in the air, it really is glossy), Bar is moved in |
Next step was drywall: What a difference a wall can make!


We used Green Board Drywall, it is moisture and mold resistant, great product for a basement! We also made sure that any boards that touched the exterior walls and floors were pressure treated. All of the drywall was hung at least a 1/4" off the floor to help prevent any moisture from seeping into the walls from the natural moisture that concrete makes.
Here is a photo of the completed wall
 |
| $95 Craigslist Gas Ventless Fireplace Before |
We needed a heat source, so I have searched Craigslist for used gas fireplaces, for us it is the quickest, cheapest, and most effective source of heat for our small area, but I didn't want to pay retail for something that I knew wouldn't fit my style! Brent and I are very stubborn in our thinking about gas v. electric fireplaces... we think that the electric ones don't provide the heat quality and we also feel that the cost to operate is not as cheap as they are advertised to be.
 |
| Craigslist Gas Ventless Fireplace After |
For us, gas is the way to go! Here is what I found for $95, sure beats the $700 Lowe's model!
Next step was to cover up the concrete walls.... here comes the previously purchased barn tin that came from the tornado damaged barn on the Windsor Farm...
 To minimize the drilling and screws/nails in the concrete foundation Brent made sure that the tin was not mounted directly to the concrete walls. He decided that he would use 2x2 strips along the top and the bottom of the wall, secured with 3 screws each to the concrete. By doing this, Brent would be able to secure the tin at the top and the bottom 2" off the wall. This would allow the walls to breath and for us to be able to detect any potential water leaks on down the road.
To make the tin around the room feel more contemporary instead of rustic we decided to shoot a coat of paint on it to give it a fresh new look! WoW it looks soooo cool!


Brent mixes the paint with acetone to use in his spray gun... it increases the drying time of the paint and makes it easy to spray! Be ready to open the windows and leave the house for a bit, the smell is vicious! The Rust-Oleum Paints that we used provides unbelievable coverage and we are happy happy happy with it and the way it looks when dry!
We positioned two more lights in the area where the pool table will be placed! These are two of the seven lights that I found at a garage sale last summer for cheap! Love the look!

We are getting close.... keep watching, we are really going to try to have everything complete by this weekend!
Here is what we have spent in time and money so far:
The cost of Day 31-40=
Black Floor Paint = $28 + 2 hours
Moving Bar and Set-up = Free + 1 hour
Dry Wall = $148.00 (12 sheets) $40 for mud and tape + 12 hours
Barn Tin = Already calculated in previous cost
2x2's used to hang barn tin = ripped 2x4's left over from previous project =$0
Screws and Drill Bits to deal with cement walls = $50
Total time to hang tin = 8 hours (with father-in-laws help)
Aluminum Paint for Barn Tin = $28 + 3 hours
Wire & Hanging new lights (wire was leftover from another project) + 2 hours
New Lights = Already calculated in previous cost
Fireplace = $95
Gas Company Service call to install/supplies = $200
Fireplace paint = Left over + 1 hour
Mosaic Tile for Fireplace = $15 + 2 hours
Amount of time for Day 31-40 = 31 solid hours
Amount of $ for Day 31-40= $604
The running total of the project = $1504/ 82 hours
Friday, January 11, 2013
Repurposed Basement: Day 3-30
SLOW PROCESS...
Well here I am, ready to update you on the progress that we have made on our Basement Remodel, but I am a little surprised how the time has slipped by and we aren't further along at this point! Goes to show that sometimes ambitions and reality don't get along!
When looking back, we have had our plates full with all of our Christmas activities and devoted some of our remodel budget to Christmas presents, so we are finally starting to get back on track and things are really looking up! Brent seems to have a rejuvenated amount of energy in finishing and I have some spouts of energy during my third trimester that I feel like telling him how and what to do!
Here are some of the steps that have been completed:
- Waterproofing is finished
- Support Beams and Braces have been replaced and reinforced
- Ceiling Painted
- New window installed
- Walls framed in
- Bar area painted
- Some electrical work
- Shelving repurposed, Shutters repurposed
- Barn Tin installed in the Bar
Wow... It looks like we have done a lot and I guess we have, but if we would have really focused we could've possibly been done! Let me breakdown what has been done and do a little explaining about how we have approach each item along with cost and time involved.

When I left off with you in my last post I mentioned that Brent was in the process of waterproofing, he did a two step process with this, 1st with Pro Flex 900 XLV around the joints and hairline cracks on the floor, 2nd he used ThoroSeal on the lower half of the walls. This was a concrete like substance that he used a broom to apply to the walls and about a foot or so out onto the floor. Here is a pic of what it looked like once it dried.
We have reinforced a major support beam that runs the length of the basement, so we could remove a couple of the support post and open up a little more floor space. We are not able to remove all the post unless we wanted to install an I-Beam, which would have been extremely expensive and would have involved bringing in extra help from outside, cutting the foundation to install, etc... so we are going to live with a few post in the middle of our space! Previously our space had a variety of wooden post supporting the beam and they had started to buckle in a few places, so we decided to go with steel adjustable floor jack supports. Brent also had a couple of 12 ft. 2 x 12's delivered to the house so he could reinforce the ceiling beam too. Here are a couple of pics showing the final result:


 |
| After |
 |
| Before |
After all the floor joist where enforced and post in place, we finished painting the ceiling.... we used a flat black paint and painted every part of the ceiling, wires and all. We had to use cans of spray paint to paint the duct-work because the latex paint would not be able to hold up to the condensation that could possibly form on the metal. Painting the ceiling was a huge job and very time consuming! We used 9 gallons of paint, about 10 cans of spray paint, and Brent ended up having to buy a professional respirator mask! After his first day of painting, he developed pneumonia after his second time of painting he developed a sinus infection and strep throat, and by the third time when he couldn't get the paint out of his noise, he decided it was time to invest! Well worth it!

We installed a new basement window and WOW what a difference it makes! We think it looks really nice too! We could feel the breeze coming in before and just by replacing with a new vinyl window we are already warmer! We will trim it out once we do the wall work, but we really are enjoying the light that it provides. We chose this window because it fully opens up and would be large enough for someone to climb out of in case of an emergency. Even though we have two walk out entrances available in our basement, we always keep in mind any additional possibilities!

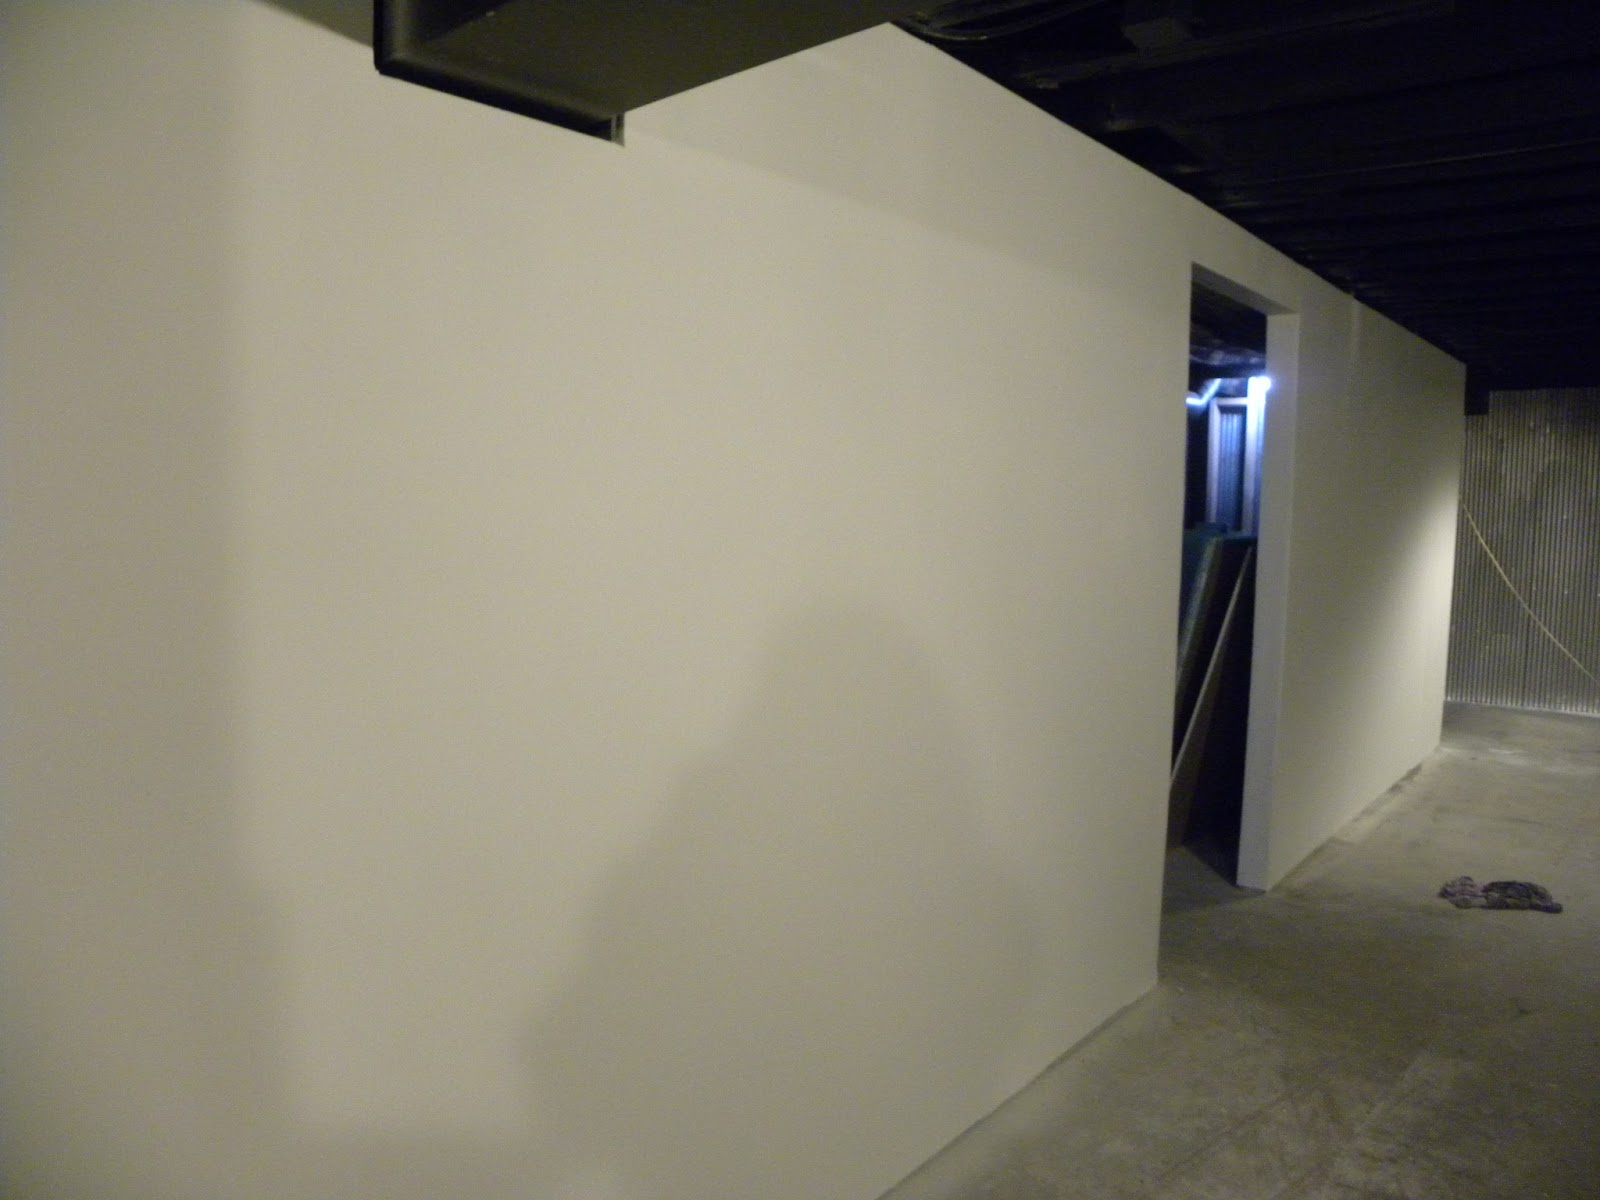
New walls have been studded in for the future bathroom, laundry room, storage area, and a huge walk in closet for games, linens, and those items that you don't need in "basement storage" but want out of sight! These rooms will be finished at a later time, our main goal is to finish the living and recreation area before we move forward with other spaces!
We have focused on an area of the basement that we will be using as a bar area, this area will have a style all it's own and will be home to our enormous bar that Brent built in the fall. This area is pretty much wrapped up except for the job of painting the floor, moving the bar in (oh... and supplies too!), and adding some artwork to the area! I painted the walls a great orange color, I painted one of the old shelving units bright yellow (item repurposed!), used Barn Tin from an old barn that was hit by a tornado, created a sliding door system using old shutters I found in the basement (leftover item of my Grandparents), an old metal rod I found out by the shed (also a leftover Grandparent item), some fabric from Walmart, and a couple of hooks from Lowes! Brent was able to install some great vintage lights that I picked up at a garage sale last summer! They are old industrial lights that were used in an old warehouse! Check out these pics!
 |
| Bright Orange Walls, Black Ceiling, and Recycled Bar Tin Accent Wall |
 |
| Black Ceiling, Old Shop Lights I bought at a Garage Sale |
 |
| Old Barn Tin wall... Came from a Barn that was hit by a tornado on the Windsor Farm |
 |
| Three Black Shutters, Flame Fabric stapled to the Back, Used Metal Pole, |
 |
| Shower rod holders and eye hooks provide for sliding action |
 |
| Awesome |
Hopefully we will start wrapping up the area and pulling our vision of a recreation space together by the end of the month... stay tuned to see what might work and what might not!
Here is the breakdown of the cost and time that has been involved in the above projects:
The cost of Day 3-30 =
ThoroSeal Waterproofing $? + 2 hours (we are still waiting for the bill)
2 12ft 2x12's delivered = $50
Lag Bolts = $20
5 Steel Adjustable Floor Joist - $150
Ceiling/Floor Reinforcement = 4 hours
Black Ceiling Paint $180 + 16 hours
New Window $65 + 2 hours (we used scrap lumber to trim and frame)
Lumber for walls $140 + 6 hours
Barn Tin $150 + 2 hours (we bought a bunch to be used in other places too)
Wire & Hang new lights (wire was leftover from another project) + 2 hours
New Lights $50 (for 7)
Orange Paint $30 + 4 hours
Yellow Paint $20 + 1 hour
Shutters Free
Hooks $10
Metal Pole Free
Shower Rod Brackets $5
Fabric $30
Time to make/hang sliding shutter doors 2 hours
Amount of time for Day 3-30 = 37 solid hours
Amount of $ for Day 3-30 = $900
The running total of the project = $900/ 51 hours
Subscribe to:
Posts (Atom)